Wednesday, January 4, 2012

Smeg fridge


This is a Smeg fridge I made for my dollhouse kitchen, which had everything but a fridge. People can't live without a fridge.
It's supereasy to make, I promise.

The casket is the first thing to make. The back and front panel are 7 cm x 4,5 cm. The side panels are 7 cm x 3 cm.
 After gluing them together, I rounded off the edges of the front panel with some sandpaper, just like on the real fridges.
The top panel has rounded off edges too.


 After this, I painted the fridge blue. You can paint it any color you like, but Smeg fridges are usually in bright, but soft colors. Orange, blue, red, green, ...
After this, I found an old pair of earrings that were never in real silver anyway, I don't actually wear AND are totally corroded. The closing 'lid' on the left, makes for a perfect doorknob for the Smeg fridge.


Look at this badass doorknob.

There you go :)

Sunday, September 18, 2011

Window


Windows in my dollhouse are illusions, just glued to the walls. Some dollhouses have real holes in the walls, but unfortunately in mine this isn't the case.

So I decided to scatter windows all around in my dollhouse, every window giving a view on another place in the world that I love. 

This is Ben Cruachan, a 1026 m high mountain in Scotland that I climbed in 8 hours. I almost died.


First, I cut out a piece of thin cardboard, 5 x 7 cm (with a 2 mm extra border to glue the window frame onto.


 Next I glued the picture onto the cardboard back. And I cut out a balsa "window frame":


The curtains on top are so easy to make you'll be surprised; cut out a rectangle in whatever fabric you like and fold it so that it makes two 'flaps' like on the picture on top of this post. Tie two pony beads on some thread to make the pull up strings for the blinds and glue it on the top window frame. Done!

Kitchen counter


This little counter is made out of 2 mm thick balsa wood and cardboard tiles.


The sides are 4 x 6 cm, the back is 7 x 6 cm.
The front panel is 7,4 x 6 cm, so that the two side panels can be glued to the sides of the back panel and the front fits nicely on top.


See?


The top of the counter is 5 cm x 8,5 cm. I rounded off the sides with glass paper.


This is the worst part. I cut out about 200 little squares, 4 x 4 mm, with what little patience I naturally have. I used a little white cardboard perfume box, which is cardboard as thin as the cardboard of a cereal box.


And then I glued all of them as regularly as I could on top of the counter.


Once this is done, it's time to make drawers in the counter. First I thought I'd just make a counter, plain and simple, but my kitchen doesn't have drawers yet and it bugs me because kitchens have drawers everywhere.


They are obviously just glued on there and not real. The handles are just elongated pony pearls.


The larger drawer is the same principle; cut out a piece of balsa and glue it on.

Wednesday, September 14, 2011

Plants

Plants in dollhouses are always a huge problem. I have a few different ways of making them, the easiest of which is; buying plastic plants in a cheap store with bad taste, and cutting it up into small leaves that I stick in a puddle of glue I squirt out in a plastic lid that I can use as a pot.

ugly plant
dollhouse plant!

Drawer


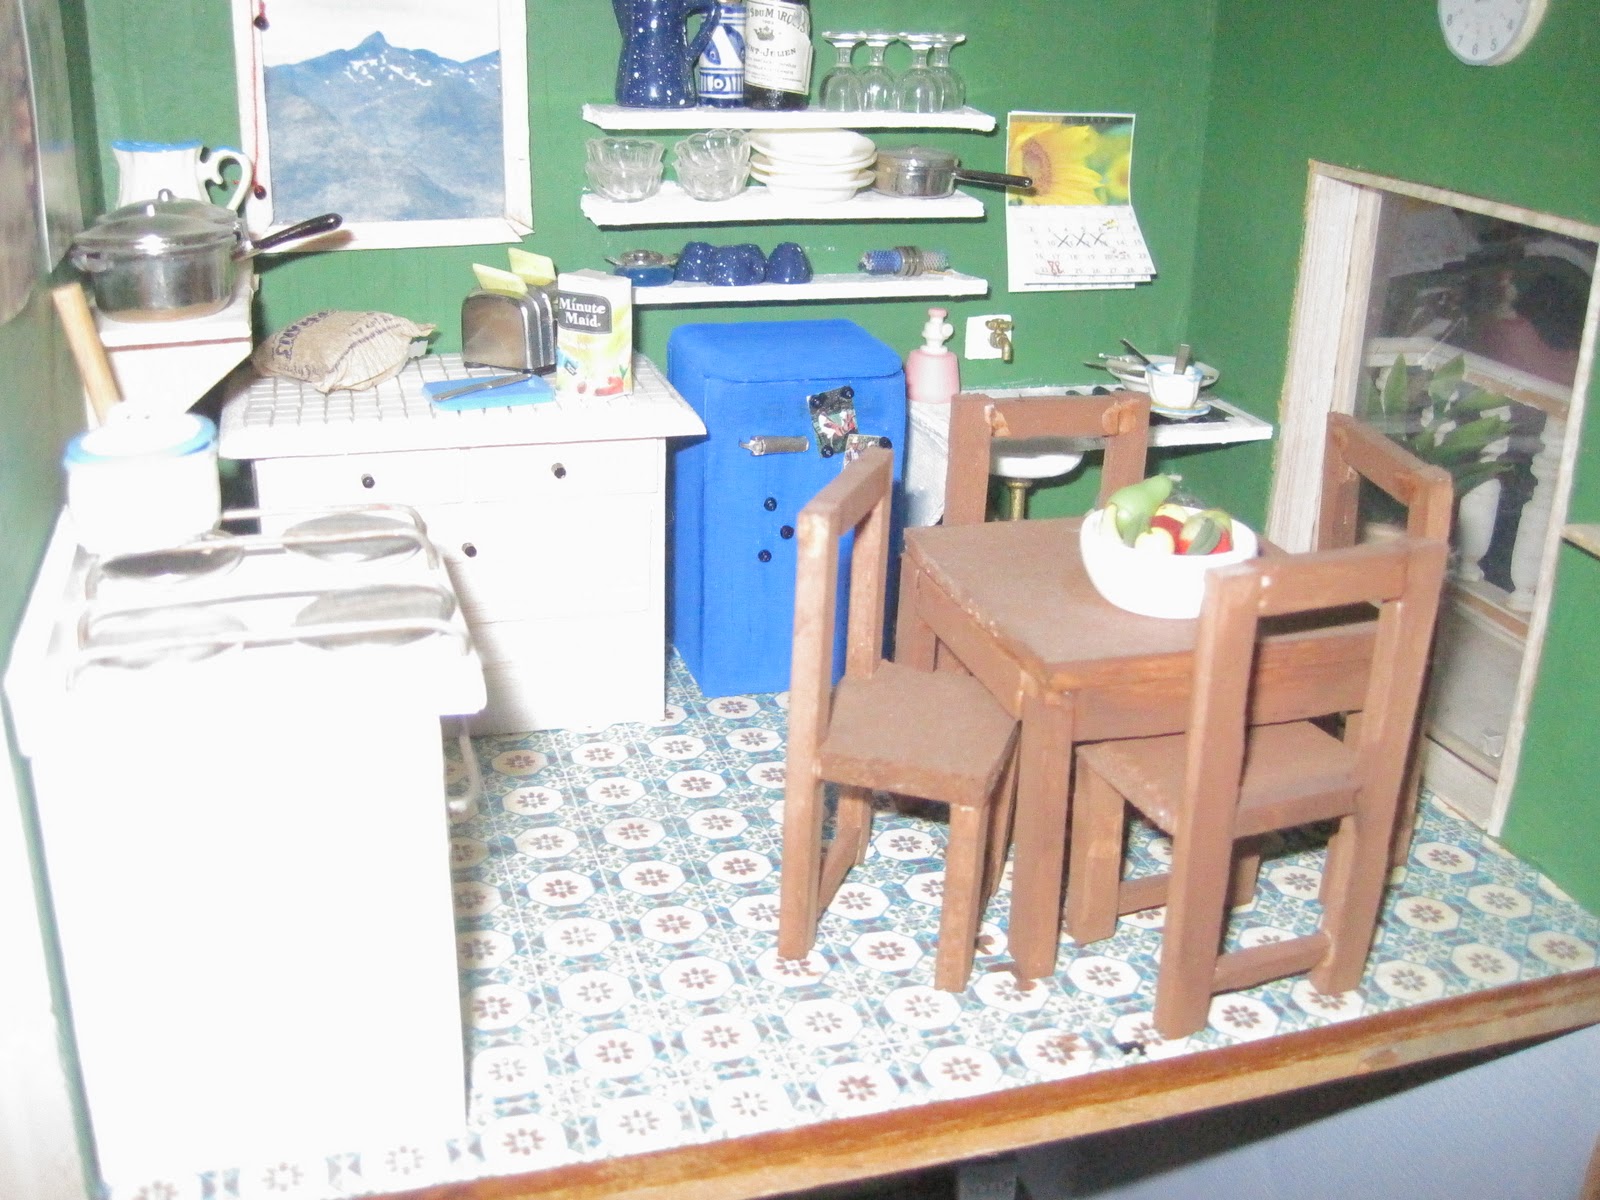
This drawer is a replica of one that is in my actual room, and this room is a replica of mine. More or less. My walls are red and I don't have a couch, but you catch my drift. This COULD be my room.


It's made out of balsa wood and only the top drawer actually opens, but nobody knows that anyway.
The front panel has the opening for the drawer in it, the other drawers are just glued on top of it.
Side panels: 4 x 6 cm
Front panels: 7 x 6 cm


When glued together you get this.


The top panel is just 0,5 cm larger than the size of the cupboard, because the edges sticking out gives it a nicer look. With glass paper I rounded off the edges.


The drawer is made up of cereal-box-cardboard; thin enough so you can bend it, tough enough so it can hold stuff inside it. I taped it all together nicely with painters' tape, because this has a color similar to the balsa wood and makes the drawer look smoothe.
The size of this drawer is 5,8 x 3,8 cm and the height is 1,3 cm. (The sizes are so weird because I had to make sure the drawer would fit in the 1,5 x 6 cm hole I cut out for the drawer in the front panel.)


And this is the result! I gave it a layer of yellow encaustic wax, I do this with a lot of the furniture I make, because I use balsa wood for almost everything and I want to avoid all of it ending up in the same color.
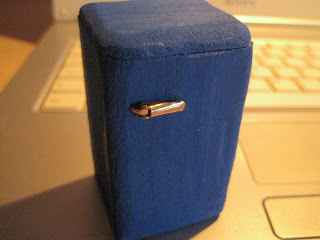
Tuesday, August 30, 2011

Bookcase


This bookcase is extremely self explanatory, but the picture could give some of you some inspiration. The two side panels are 10 cm x 1,5 cm, and the shelves are 1,5 cm x 5 cm. The books are made of cardboard on which I glued book covers I found on Google Images! You copy them into an Open Office document, you crop them to a really small size and you print them. Very easy and very cute.

Monday, August 29, 2011

Nightstand


This little nightstand is made out of balsa wood.   


These are the parts you're going to need: 4 sides, one slightly larger top panel and one slightly smaller panel to make the door.


This is what they look like once they've been assembled.


After that has dried, I add the legs. I let them dry up to a point where the glue becomes "bendable" upside down, and then I let it harden when the nightstand is standing upright so I'm sure it won't be wobbly.