Friday, July 15, 2011

Ikea Fjellse bed


This is actually my own bed in my room, it was really cheap at Ikea! Since I like simplicity in furniture, I thought I'd make it for my dollhouse. It's easy and quickly done.

  This is the mattress support, it's out of foam cardboard because nobody will see it once your bed is made up. This is 9 cm x 10 cm.


Then I surrounded the support by balsa panels, so as to make the bed frame. I glued little wooden beads under it to make the beds 'legs', which aren't the same as the legs of the Ikea bed, obviously, but I thought little round legs didn't look bad on a dollhouse bed. I think if I had made them out of balsa, they would even have splintered and broken.


To make the "head" of the bed, I used matches of which I cut off the sulfur bit. I glued those on top of the frame as you can see here.


Next I glued one bar out of 0,5 mm balsa on top and on the sides, and the bed is finished! 

Thursday, July 7, 2011

Linnen cupboard


I bet you're thinking oh my god what I can't make this, but the truth is, you can, because it REALLY wasn't   hard. I made this in one hour and I have no more fine skills than an unemployed plumber!


The back of the cupboard is the white foam cardboard, since it will be invisible, no need to use balsa for it. The two side panels are glued to the foam cardboard back panel.
Back panel: 10 x 9 cm
Side panels: 10 x 3 cm


These are the legs of the cupboard, they add 2 cm to the height of the cupboard which is why the back panel is only 10 cm. I cut out the little 'feet' to give the whole thing a little 'country' look my mom likes.
Legs front and back: 2 x 9 cm
Legs on the sides: 2 x 3 cm


I added the bottom (invisible = foam cardboard) and the top and some shelves.
Bottom: 10 x 3 cm
Top: 10,5 x 3,5 cm
Shelves: 8,8 x 2,5 cm

These are the doors. They are 4,5 x 10 cm and on the right one I added a 0,5 x 10 cm balsa bar on top to be able to "close" the cupboard properly. The moldings were balsa bars of 0,5 cm wide and the middle panels on top are 7,5 x 2 cm.


Next I glued the 'feet' of the cupboard on the bottom, look how great it looks!


The hinges are really just thin cardboard rectangles glued on the sides of the cupboard and to the doors, nobody is going to see them anyway! I intend to paint them black just in case, but really the point is just leaving the door slightly opened so you can see the linnen neatly folded in the cupboard! You can also wax or varnish the cupboard in a darker shade, and give it a worn off look.
Enjoy!

Flatscreen tv


The tv was crafted out of balsa wood, so is the DVD player, and the remote control out of a grey rubber sheet. I'm not going to explain all the details, because I forgot to take pictures as I was making these anyway, but how I made the flatscreen for the computer is pretty much the description for the tv. The DVD player is a balsa rectangle on 4 black beads.
It's mostly just for inspiration!

Countrystyle furniture: Shaker bed


My mother, who is my dollhouse-building-grandfather's daughter, couldn't help but notice me getting all crafty around the house I have, and decided to pick up hers aswell. Her house was made by the same man, it was my house when I was a small child though soon I was in need of a larger one. I passed this little one on to my mom because she wanted to try creating a dollhouse of her own.
But mom is starting from scratch, I inherited some old furniture from my older sister when I started mine so I had something to go on. Mom is a quilter, she does patchwork more than she does household chores. She wants her house to be entirely in a country/shaker style, so I proposed to make her a little country bed to start with.


You could probably guess it, but the bed was made out of 2 mm thick balsa wood. I was not difficult but it took some imagination and research to find a nice and doable country bed. I asked mom her preference and decided to make the one on top.


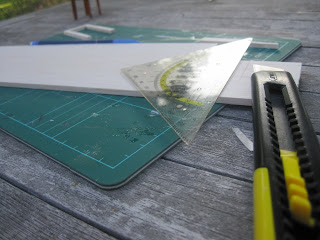
With the help of a bottlecap I drew the wavelike design of the bedframes and cut them out with a hobbyknife rather than a simple cutter, because as you can see those are much smaller, and thus more precise and accurate.
Then I made the posts of the bed out of 5 mm balsa. I cut them 5 mm wide so I had square posts that would look really realistic on the bed. Shaker furniture always has some kind of molding on its furniture legs though, so with a hobbyknife I extremely carefully molded that out of the balsa. Be very, very careful and patient, balsa is fragile and it's often better to scrape off a piece with glass paper than to cut it off brutally with a knife.


The mattress support is cut out of foam cardboard, because it will be invisible so I was reluctant to waste balsa on it. I cut out two sides for the bed to hide the cardboard entirely and make the bed a solid frame, glued everything together and there, I had the cutest little shaker bed for my mom:


You can paint it with a dark varnish to make the bed look old and antique

Wednesday, July 6, 2011

Personal computer

  This wasn't difficult at all. Luckily we have internet and flatscreens, which are much easier to make than those big old screens. The screen consists of three parts; the flat horizontal "foot", the vertical "stand" which holds the screen up, and the screen itself. All were made out of balsa wood. The foot is a square I cut out and then shaped to be a little rounded off at the front with glass paper (an asset you cannot live without when  you're working with balsa.


The stand is a small beam that I didn't cut out straight at the ends, but in a 45° angle in the opposite direction at each side. This way the stand isn't straight on the foot but leans towards the front, and the screen isn't straight but leans a bit backwards when you glue it on.
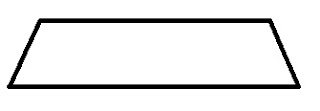
The screen itself is a screen printed off the internet, I glued the picture on a balsa wood rectangle. I cut the vertical edges of the screen differently though, if you ever saw a flatscreen you will have noticed that the edges point towards each other at the back of the screen, like this:
After gluing everything in place, I painted the entire bunch in black and felt really proud of having successfully crafted a miniature flatscreen.
The tower is a "box" I made out of thin cardboard, painted black and glued a printed out picture of a computer tower onto. The mouse is a small rectangle of balsa wood I shaped into a mouse with glass paper.
A computer isn't much without a keyboard obiously, so I made that out of a grey rubber sheet on which I glued a printed picture of a keyboard. I cut the rubber sheet into the same size as the picture, glued it on and voila.

The table and the stool were made by me too, by the same principles you can find in the "chairs are easy" post I posted earlier this week. Wasn't difficult, you just need good glue!

Ukelele


There's no reason why a dollhouse can't have an ukelele. I was very apprehensive about trying to make this, but as it turned out, it wasn't as hard as I expected it to be. You need some balsa wood, a very accurate cutter and a lot of common sense.
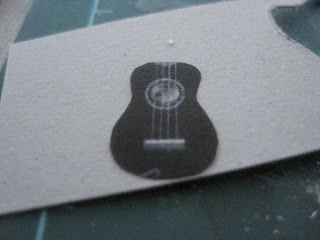
I printed a very small picture of an ukelele and started by gluing it to a piece of thin cardboard I cut in the same shape. I did this because in case I didn't manage to cut out the exact shape of the ukelele out of the balsa wood, I'd still be able to suggest the instrument by gluing the cardboard shape on it. I always think of a plan B because I usually need one to save face.


Next I carefully cut out the "head" of the ukelele. I started by cutting out a rectangle, out of which I cut the details. Be VERY careful, balsa wood splinters, scales off, falls to pieces, explodes, whatever. I glued cylindric little beads to it to make the tuning keys.


The body was what I was most afraid of. But it went ok. You draw the outlines of the uke on a piece of balsa and then with a fine cutter you start shaping it.


When this is done, you glue the picture of the uke onto the body you have just made, you attach the "head" and there, you have a dollhouse ukelele:

Monday, July 4, 2011

Chairs are easy! Even for me.

I am going to make this very easy for myself because the pictures really do speak for themselves. All you need is balsa wood, a good sharp cutter and a plan. The chair is 7 cm high, 3,5 cm wide and 3 cm deep. I made 4 in 2 hour's time, and if the glue had been dry any faster I would have saved oceans of time. But I chose to go with the glue with the rainbow on it. And it turned out to be a crappy one. Enjoy!


Headphones


Headphones are something I could not possibly miss for even a day, so I didn't think my inhabitants should either. Can I just say though, this wasn't easy and it took me a whole hour to make the smallest little thing. And it shows, so, if you make it, better put it somewhere in the back of the room where the shape can be guessed and everyone goes "aaahhh she's got headphones in her dollhouse" but nobody can really tell if it was made or bought. Let me just show you how I did it, and maybe you can make a prettier one.


What you need is thread, a hairpin, two little circles cut out of a rubber sheet and one of those very thin wires wrapped in white plastic you use to close up trashbags.


I cut the hairpin in the middle because the zig-zag side of the pin is useless. The other side of the pin is a little flat so good for the 'basic' crown of the headphone. I put the two rubber circles against it (I didn't glue anything yet!!) to see what shape it should be, this is really helpful to see if it's too much of a C or too much of a U.


You can leave it like this if this is enough of a headphone for you, there are models like this and you can clearly tell what it is. You just glue some thread onto the rubber circles to make them look like wires and you're done. But I needed a more fancy headphone so I added some wire to it.
The trashbinwire can easily be freed from the plastic coat it's in, you just pull it out in the beginning, stick the little end between your teeth and pull off the plastic -that's how I do it but normal people might just use pliers.


The wire is going to be used as an "auxiliary crown" like the quality headphones usually have.


I cut a piece of cardboard slightly larger than the rubber circles to make the outside of the actual speakers. I glued the threads that would form the headphonewires in between the cardboard and the rubber. As you can see I retardedly glued the left one on the wrong side, but I corrected myself later on. The picture is just to give you an idea.


After adding the hairpin piece and painting the whole bunch black except for the auxiliary crown that can stay in a metal color, I had actual dollhouse headphones, and hopefully you do too:

Nerdy objects


I saw no reason why a dollhouse couldn't be a true reflection of what young people are really into nowadays, so I decided to make an iPod touch and a Nintendo 3DS. No, I'm joking, I just thought it would be funny to stuff my dollhouse with electronics that are for hardcore gaming populace only.
The 3DS is the easiest thing in the world to make, you print off a 3DS you found on google after you cropped it into the right size, and glue it on a piece of thin cardboard. You fold it and you're done. The 3DS Pokemon game is the same principle; crop it the right size, print it, glue it on cardboard.


The iPod touch is not an amazing challenge either, although you need to be patient and handy to get the wires of the headphones right.


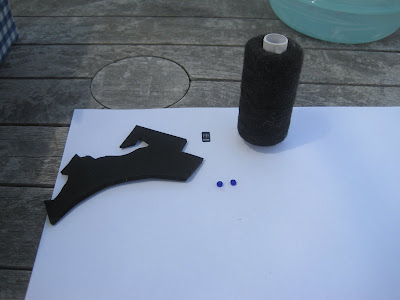
What you need is a rubber sheet, preferably black but another color will do if you have black paint, beads, black, rather thick thread and of course the printed iPod touch front.


I glued two beads together to make the headphones, the colors are entirely to your own liking I just didn't have any black beads.


I cut out the iPod front, glued it on a rubber sheet I cut into the same size and there I had an iPod.


The wire of the headphone was made out of thick thread I found in my mother's sewing basket. That thing is a goldmine. I made a knot for the "T-section" of the wire. I glued the thread to the back of the iPod because the headphones are actually stuck in the bottom of the iPod. You glue it to both bead-headphones and you have yourself a tiny MP3-player.